This guide will show you how to get started with Very Good Calendar Sync and explain the basic workflow of setting up a synchronisation.
When opening Very Good Calendar Sync for the first time, it will request permission to access your Calendar.
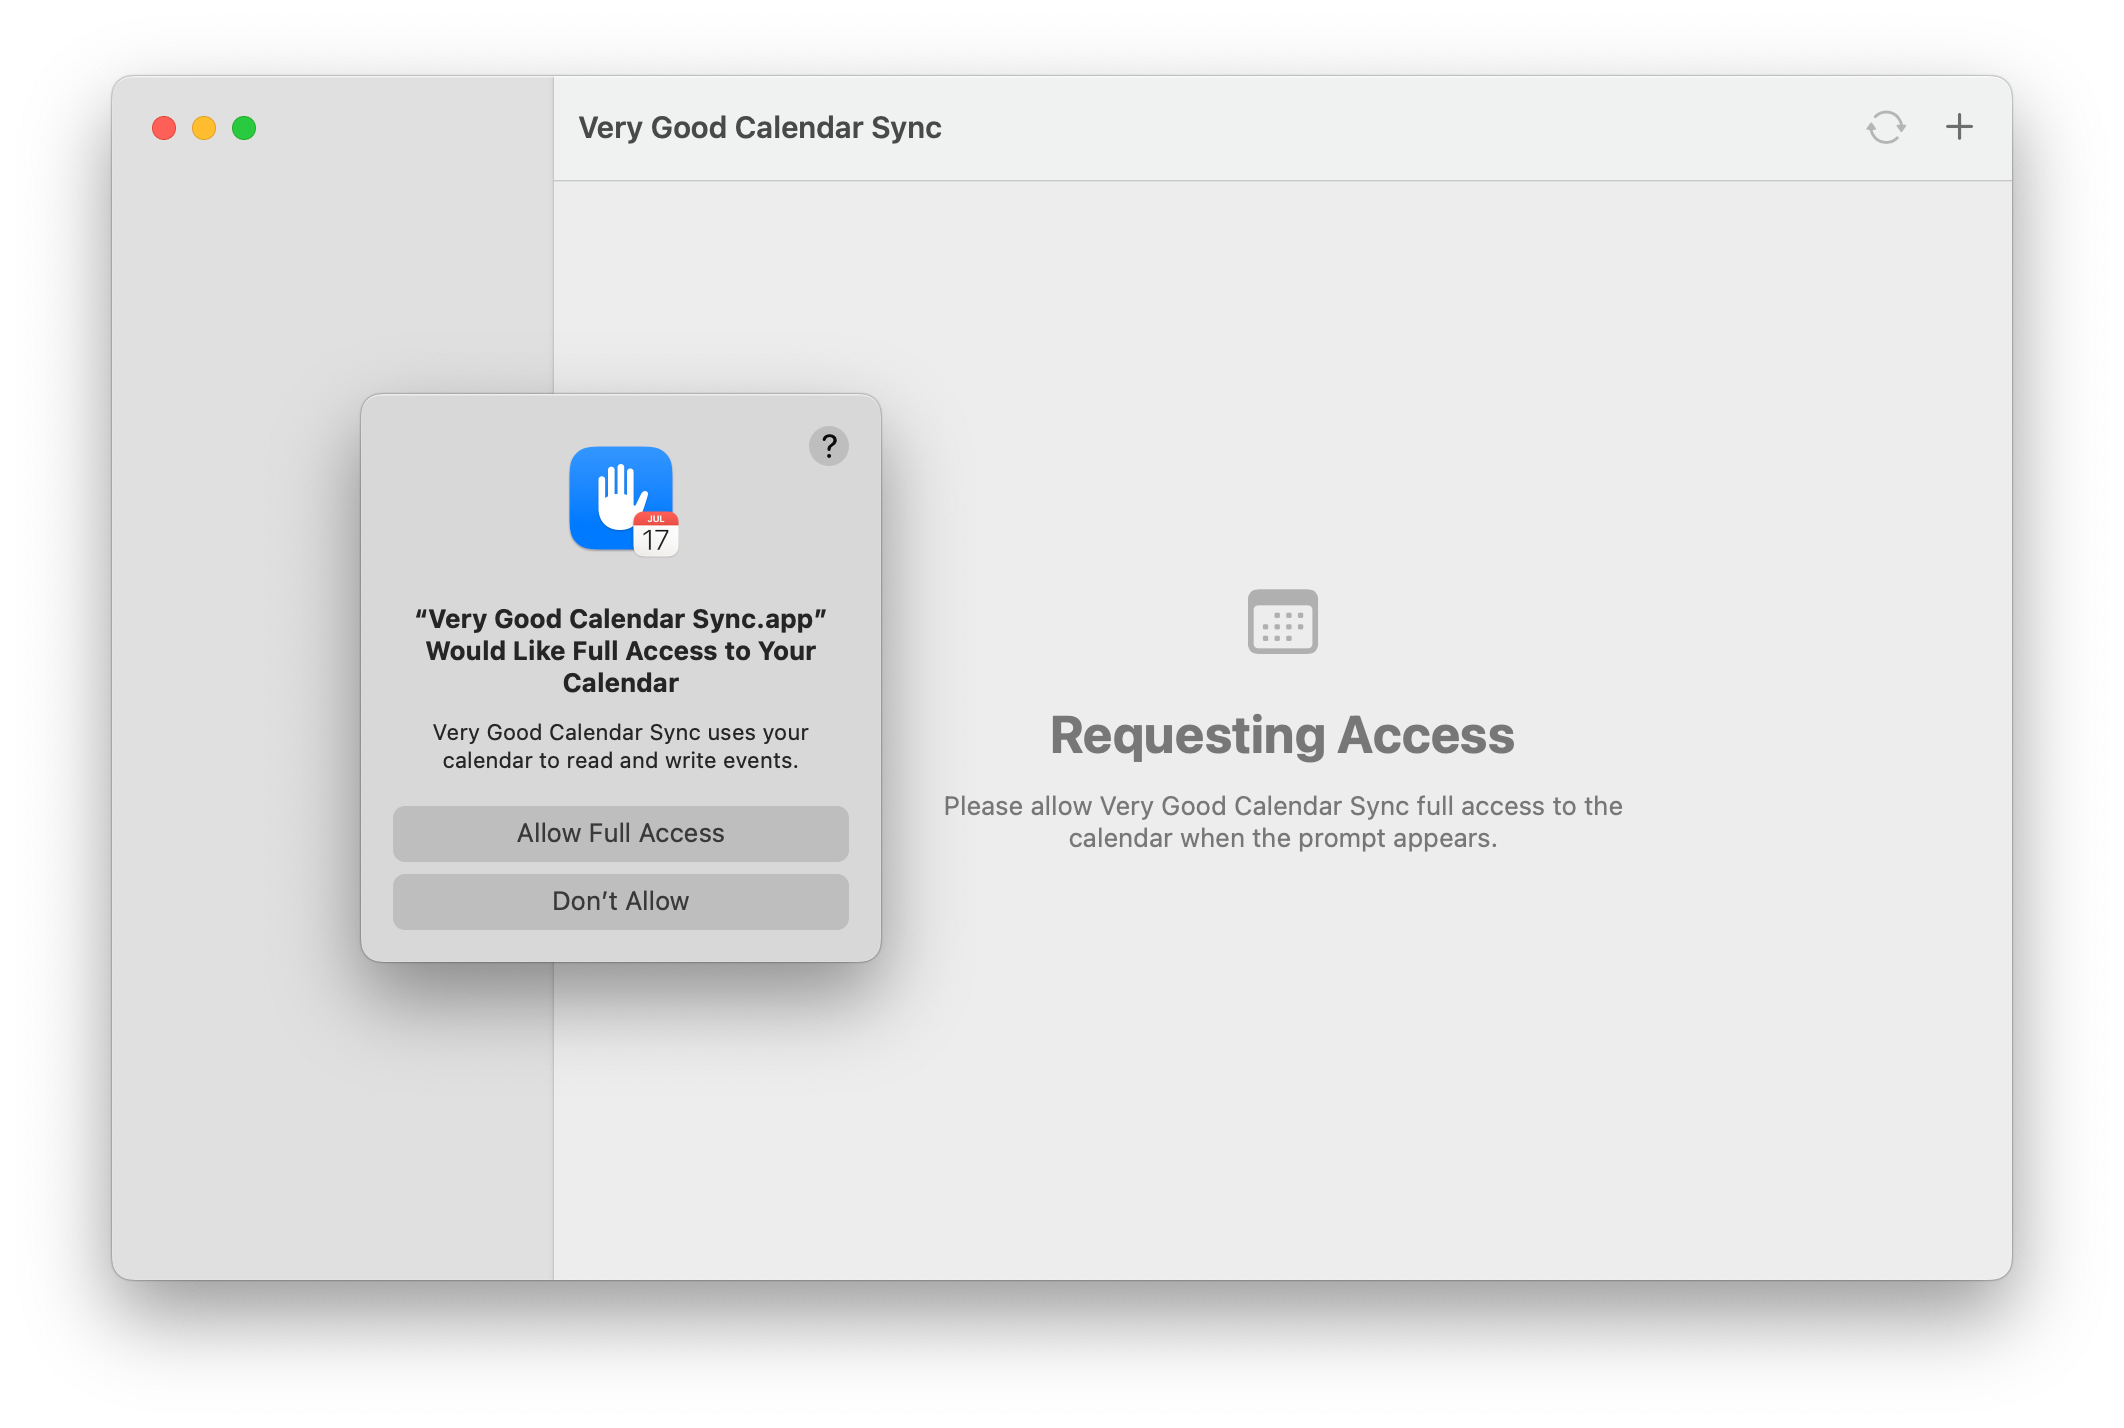
You have to “Allow Full Access” in order for the application to work. This prompt will only appear on the very first start of the application. Once access has been granted, macOS remembers that for the next time.
When given the appropriate access, the application will look like this when starting for the first time:
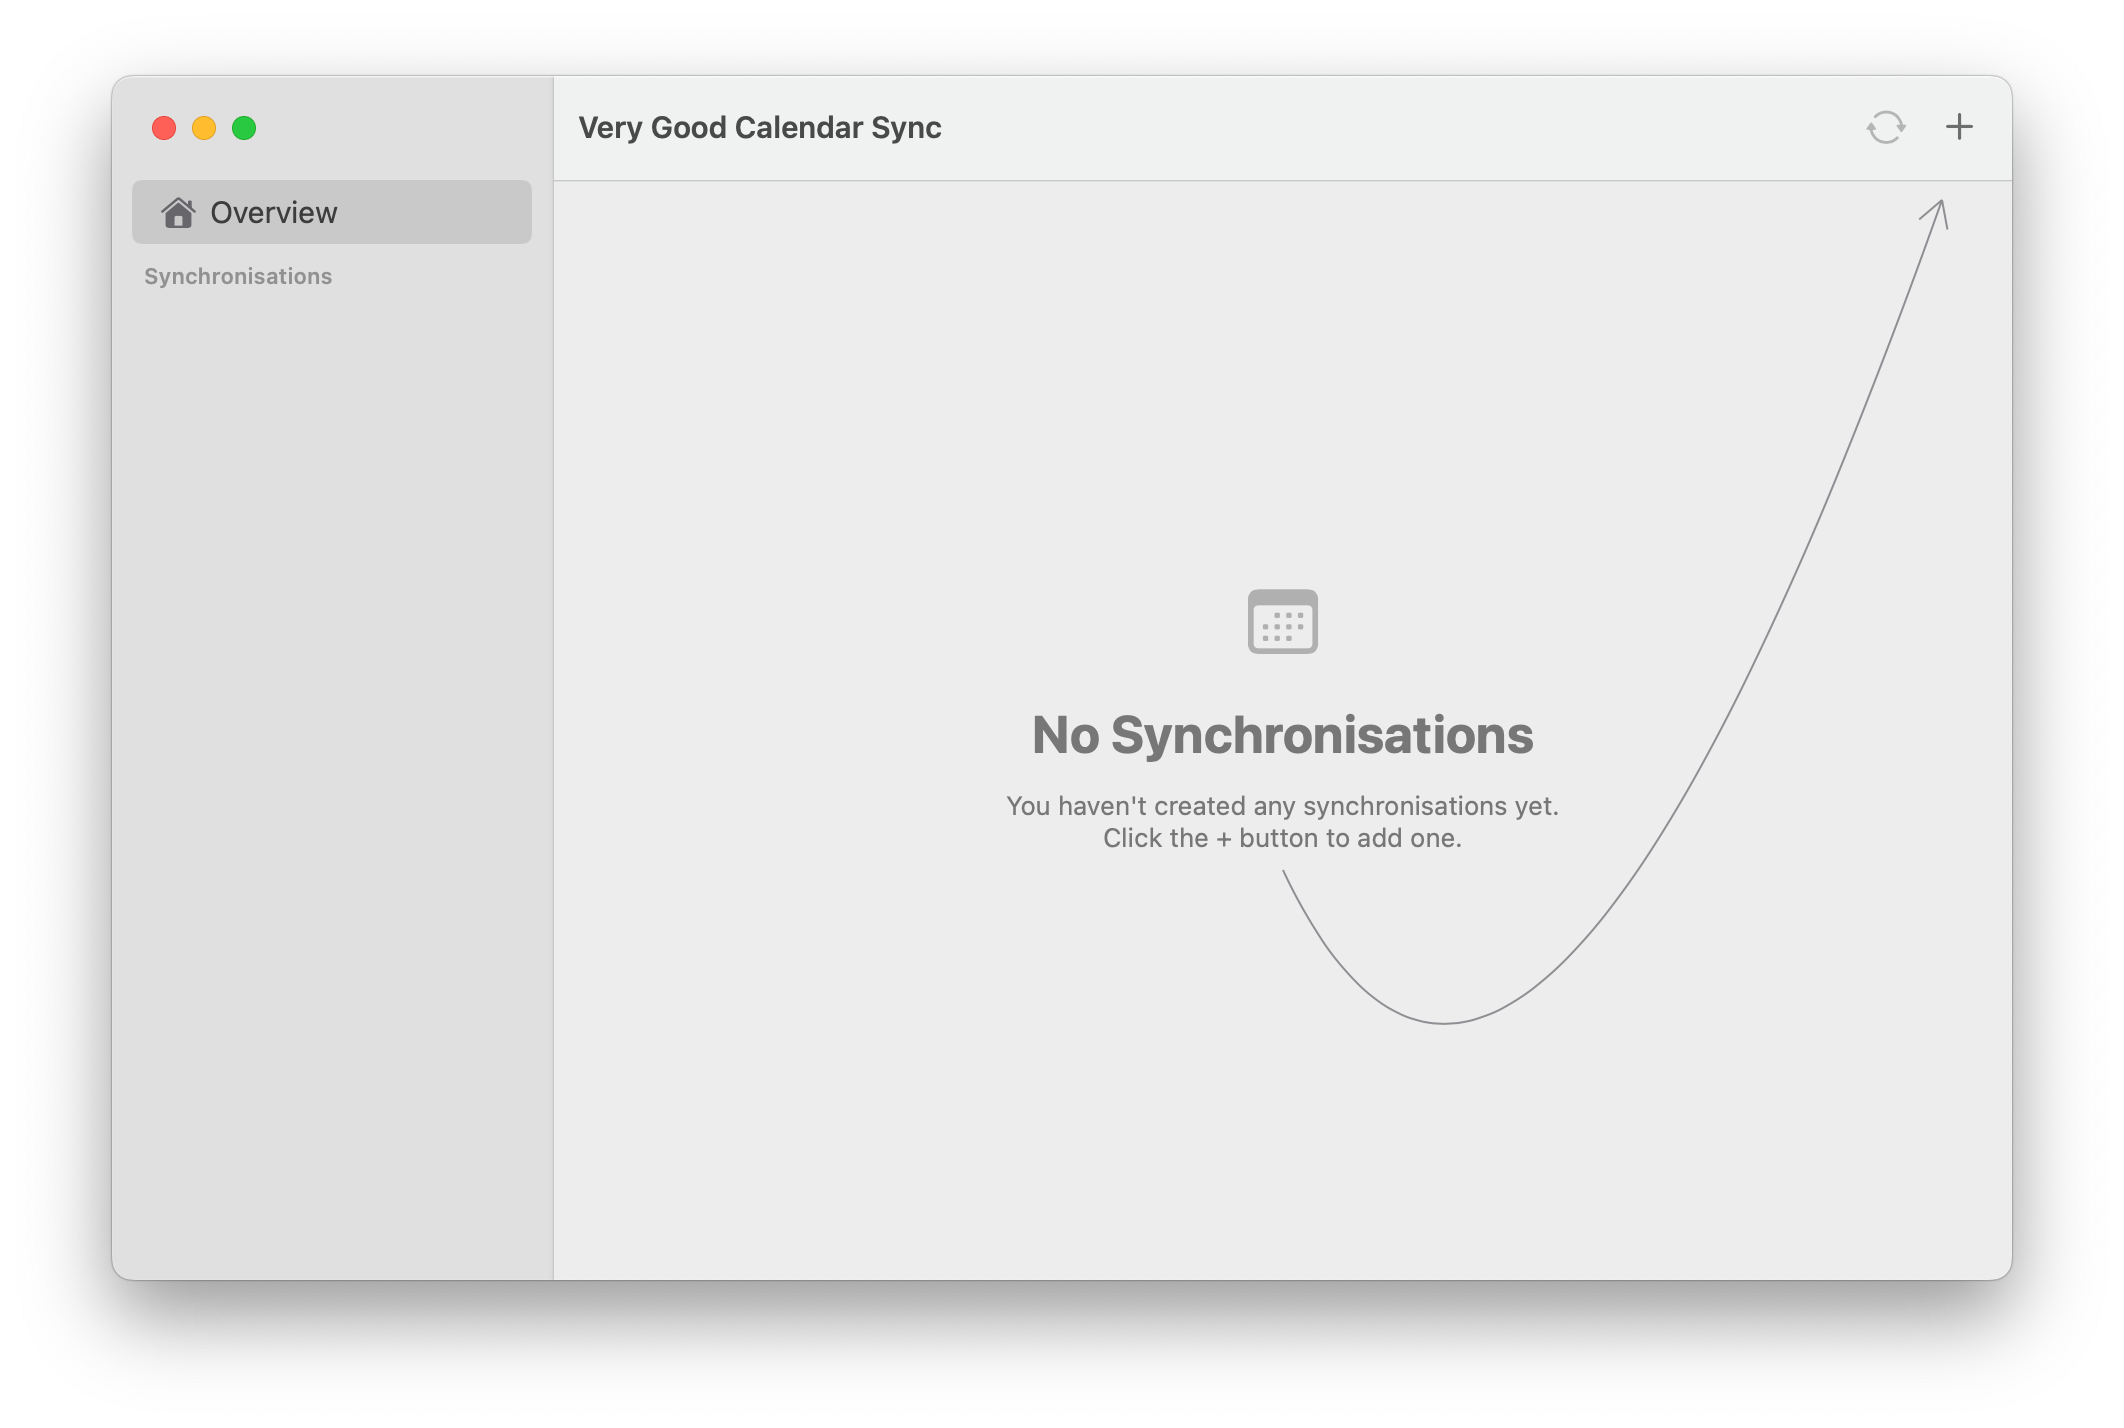
The arrow guides you to what you need to do next in order to create your first synchronisation: Clicking the plus button at the top right. Having done that, you will see the user interface to add a new synchronisation:
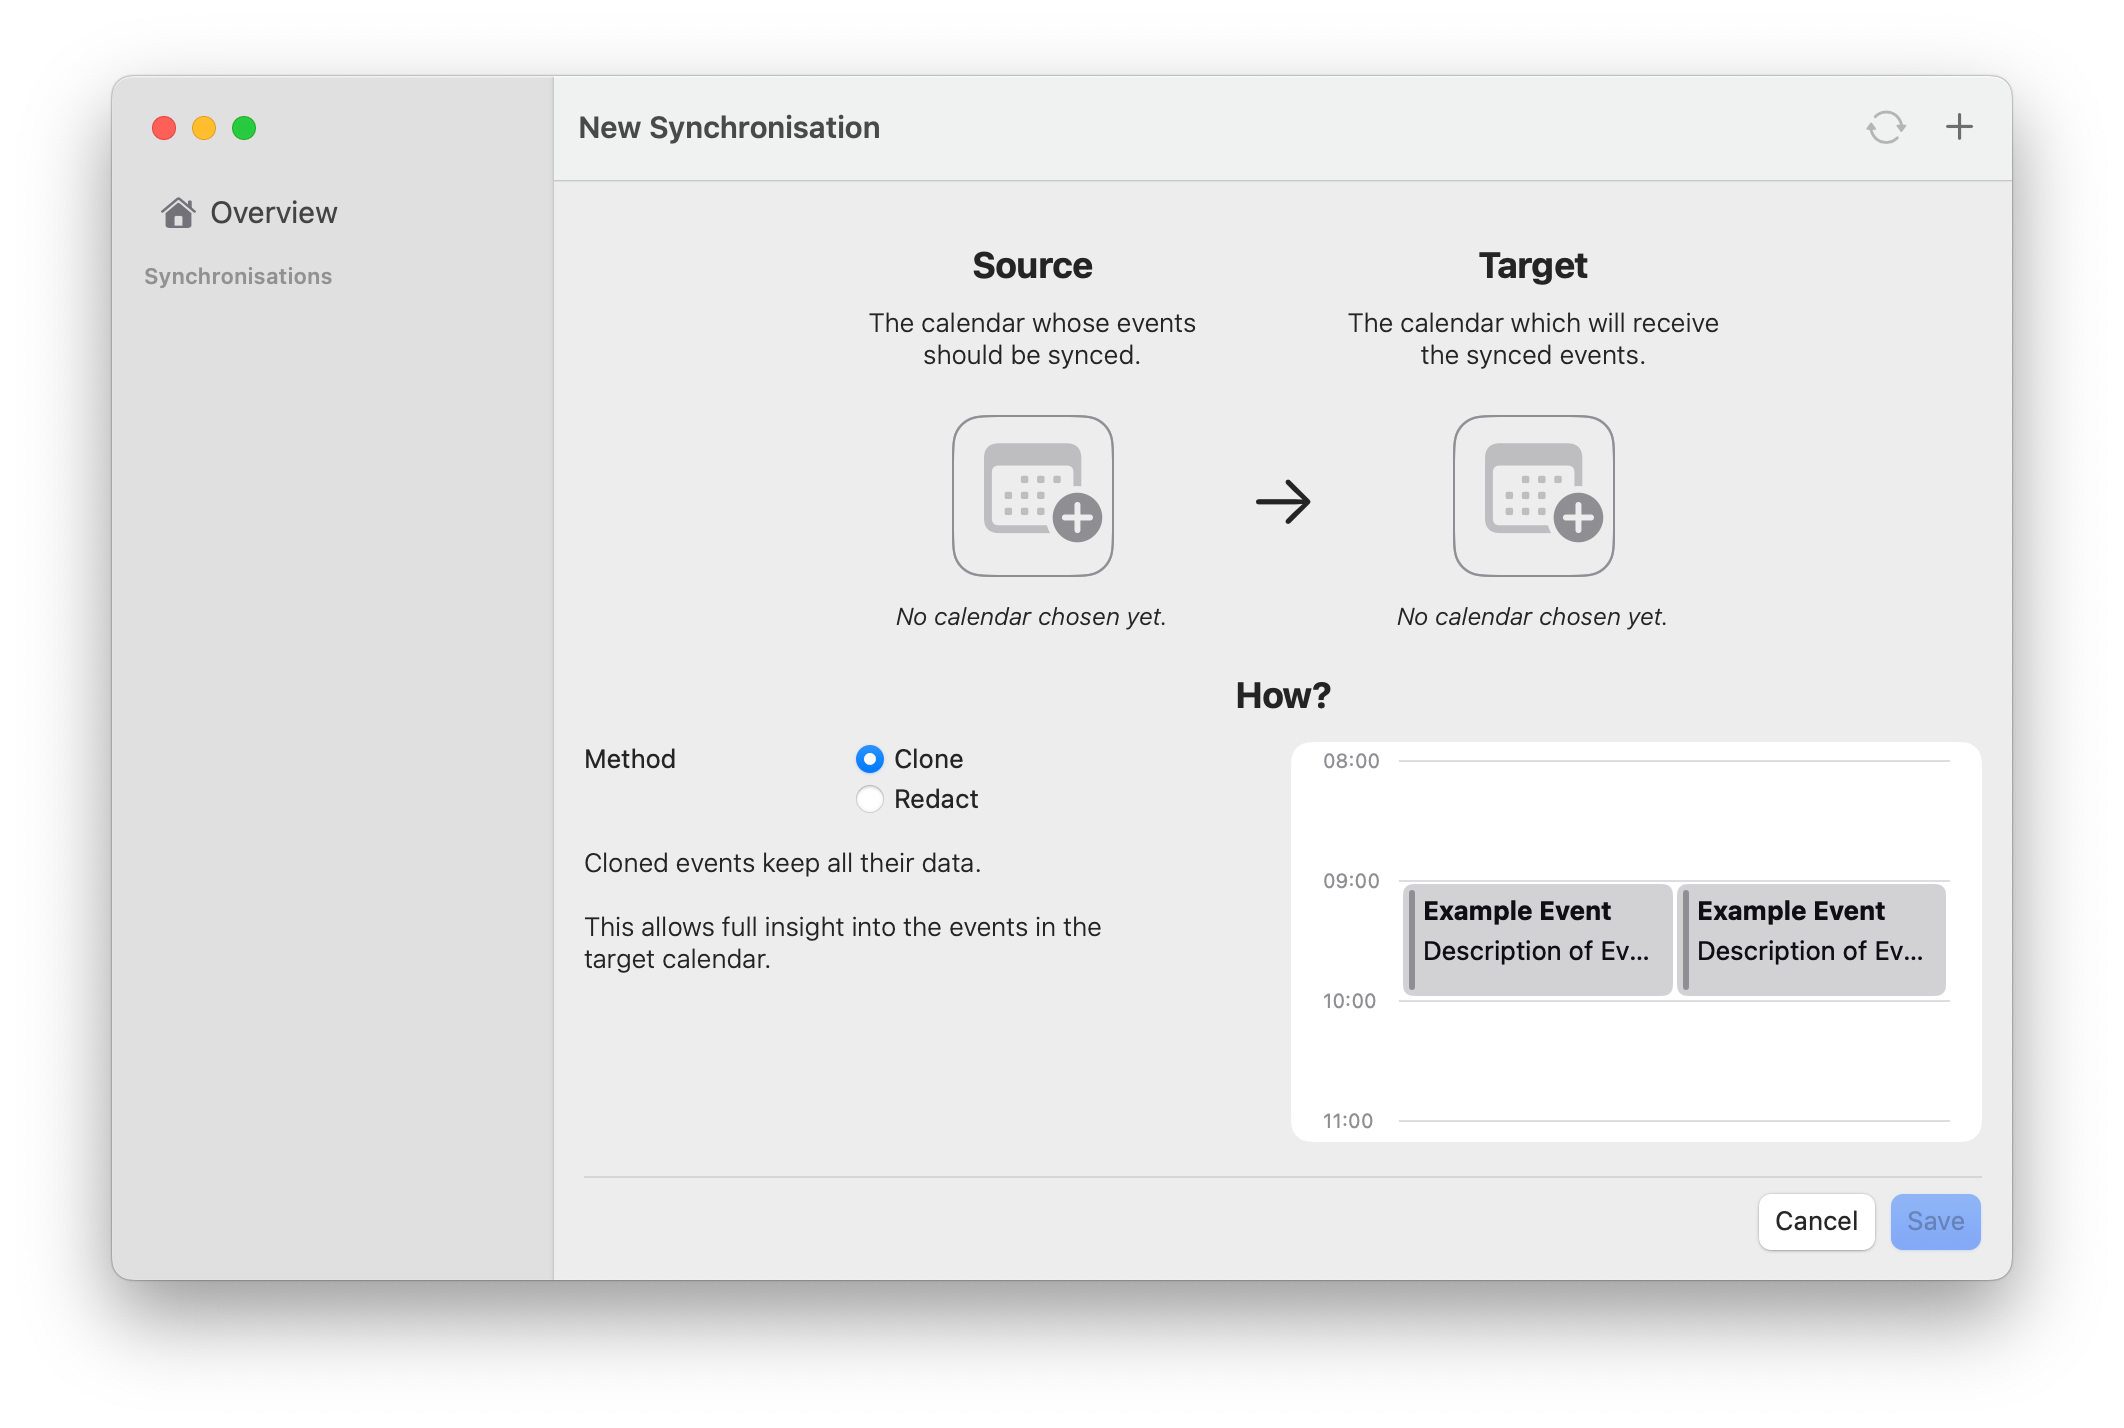
From here, you can click on the calendar icons that have the plus sign to select the source and target calendars.
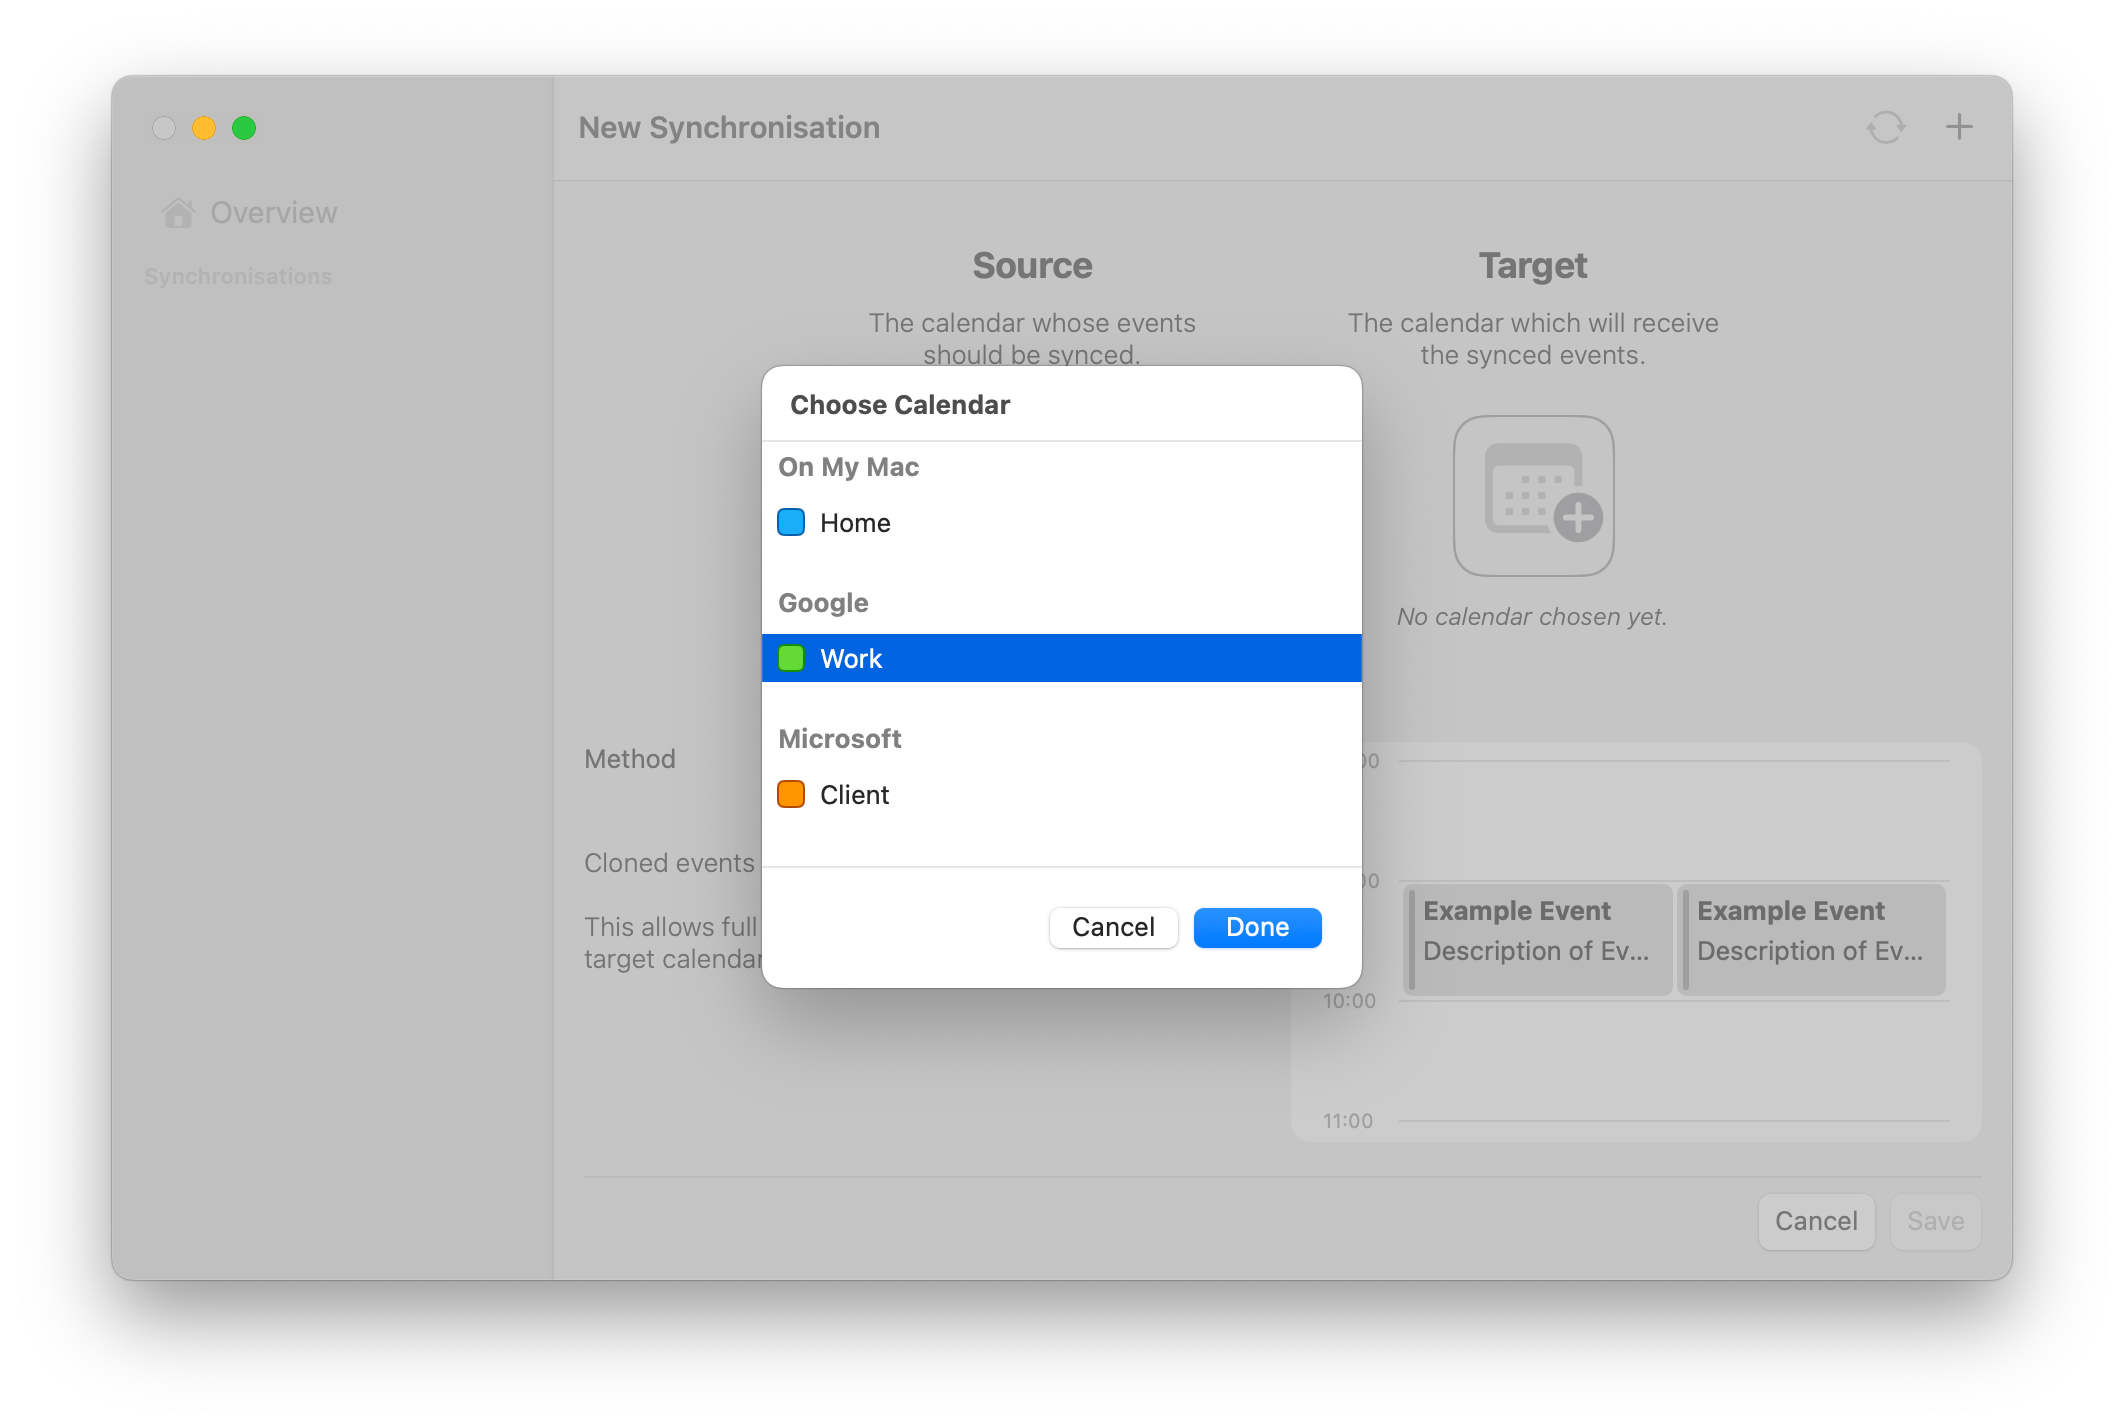
The modal will likely look different for you compared to the demo data above. But it will be grouped by your different calendar providers (i.e. Google, Microsoft, iCloud, etc.) to show the calendars to choose from.
Once both source and target calendars are selected, you can also adjust the configuration settings for the synchronisation.
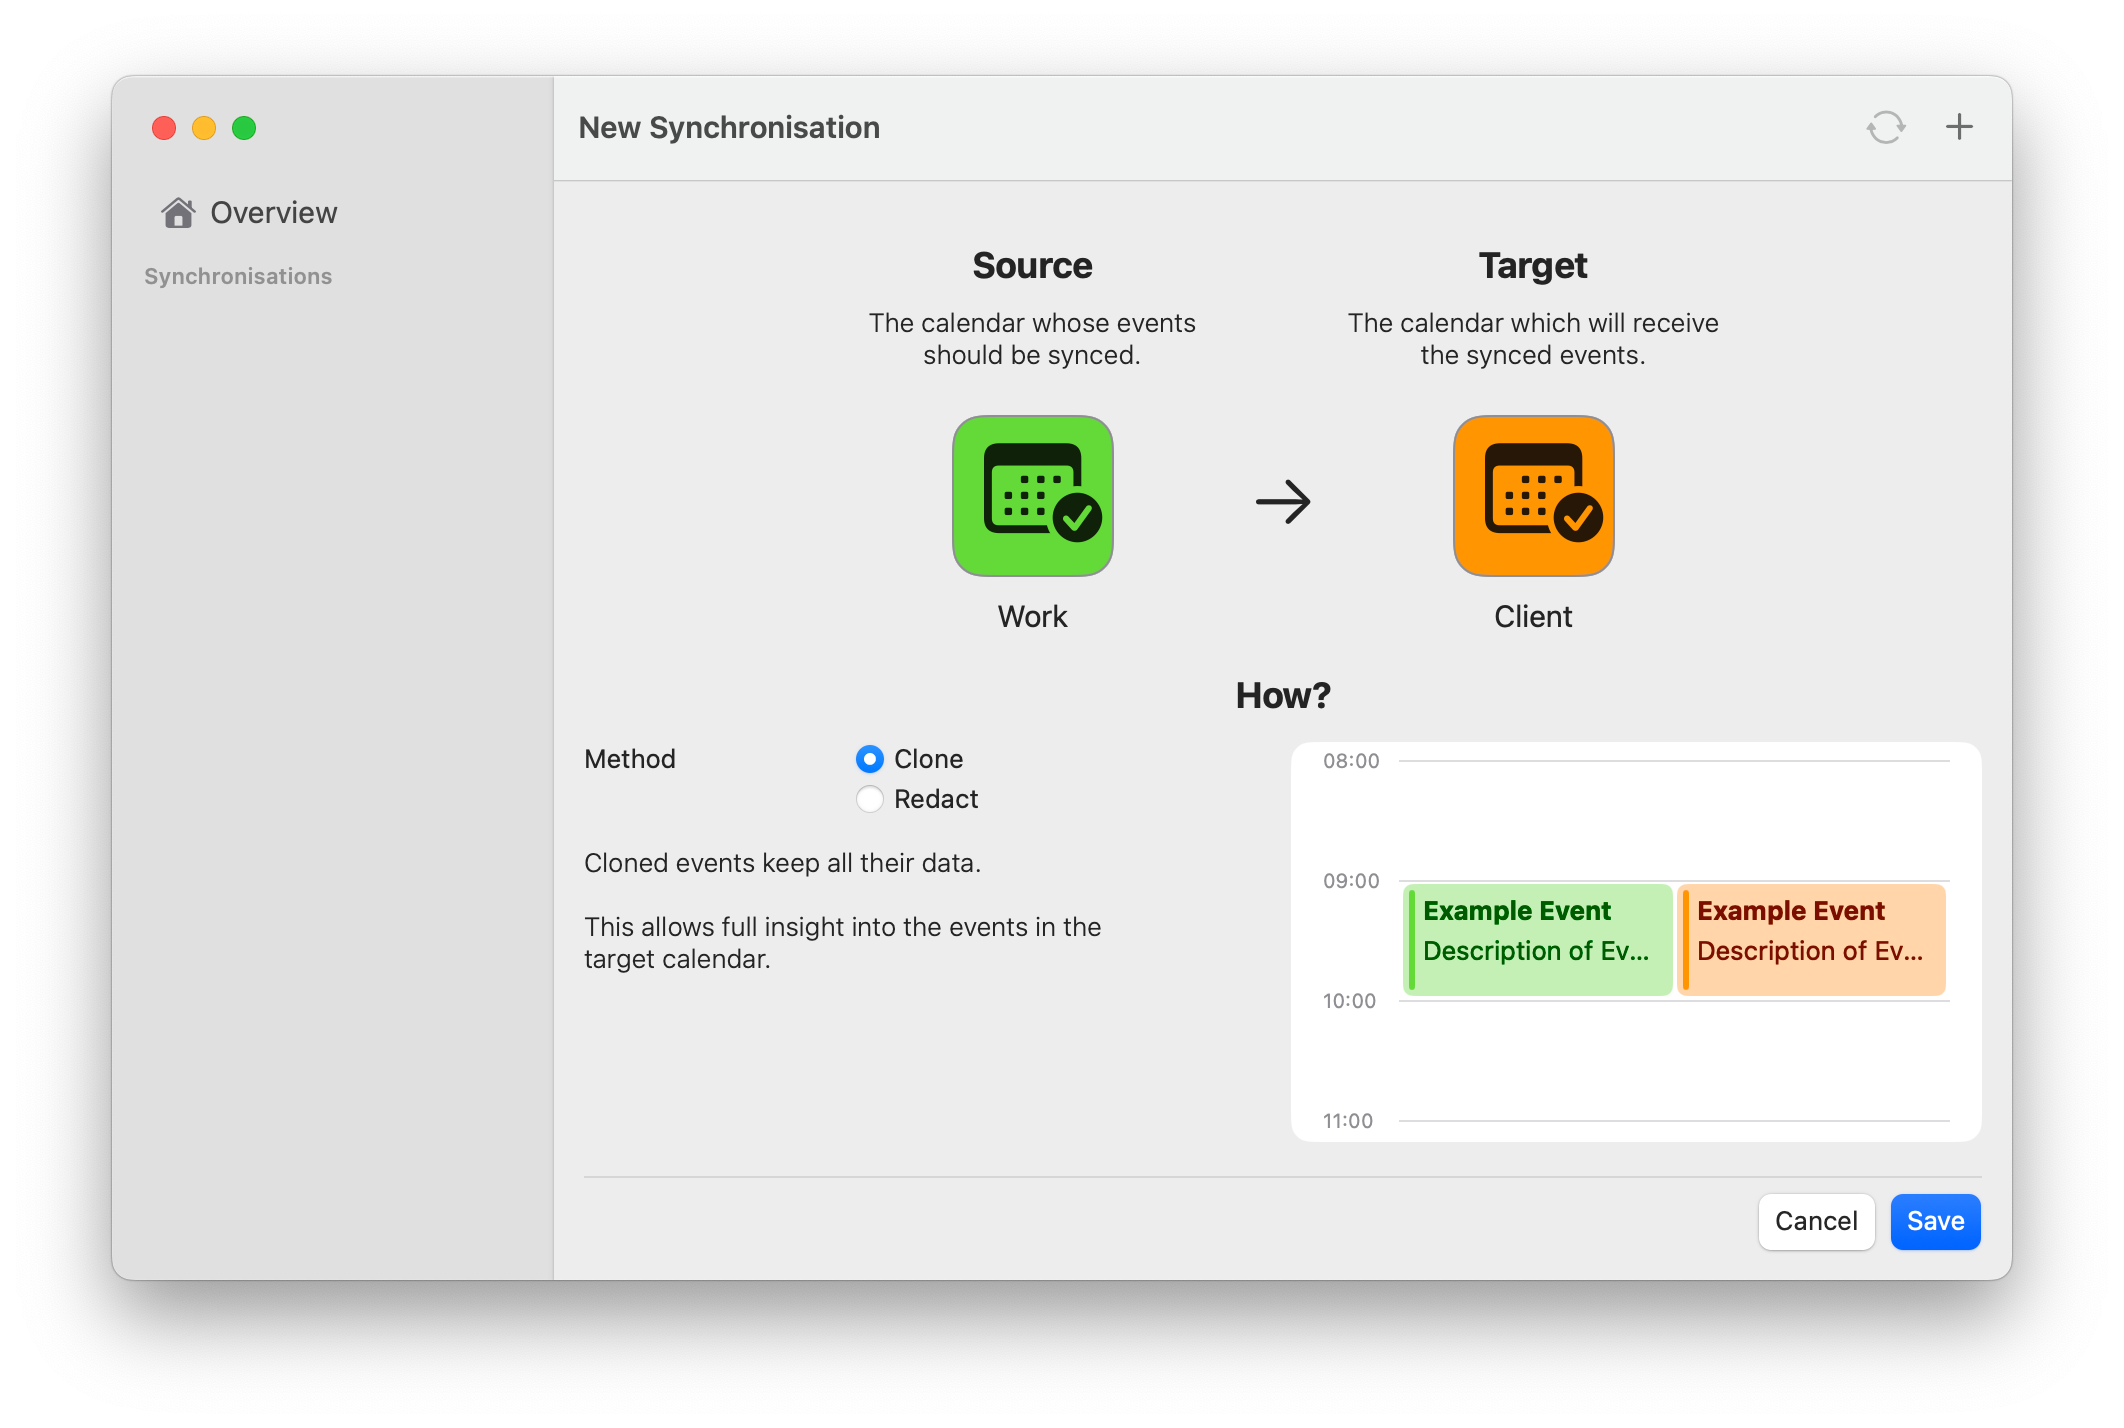
What you can also see at the bottom of the window, is a preview of what your calendar will look like when events have been synchronised. For now, stick with the default for all settings.
More details about what each setting means and changes, please take a closer look at the dedicated documentation for all settings.
When clicking “Save” you'll see a progress modal show up.
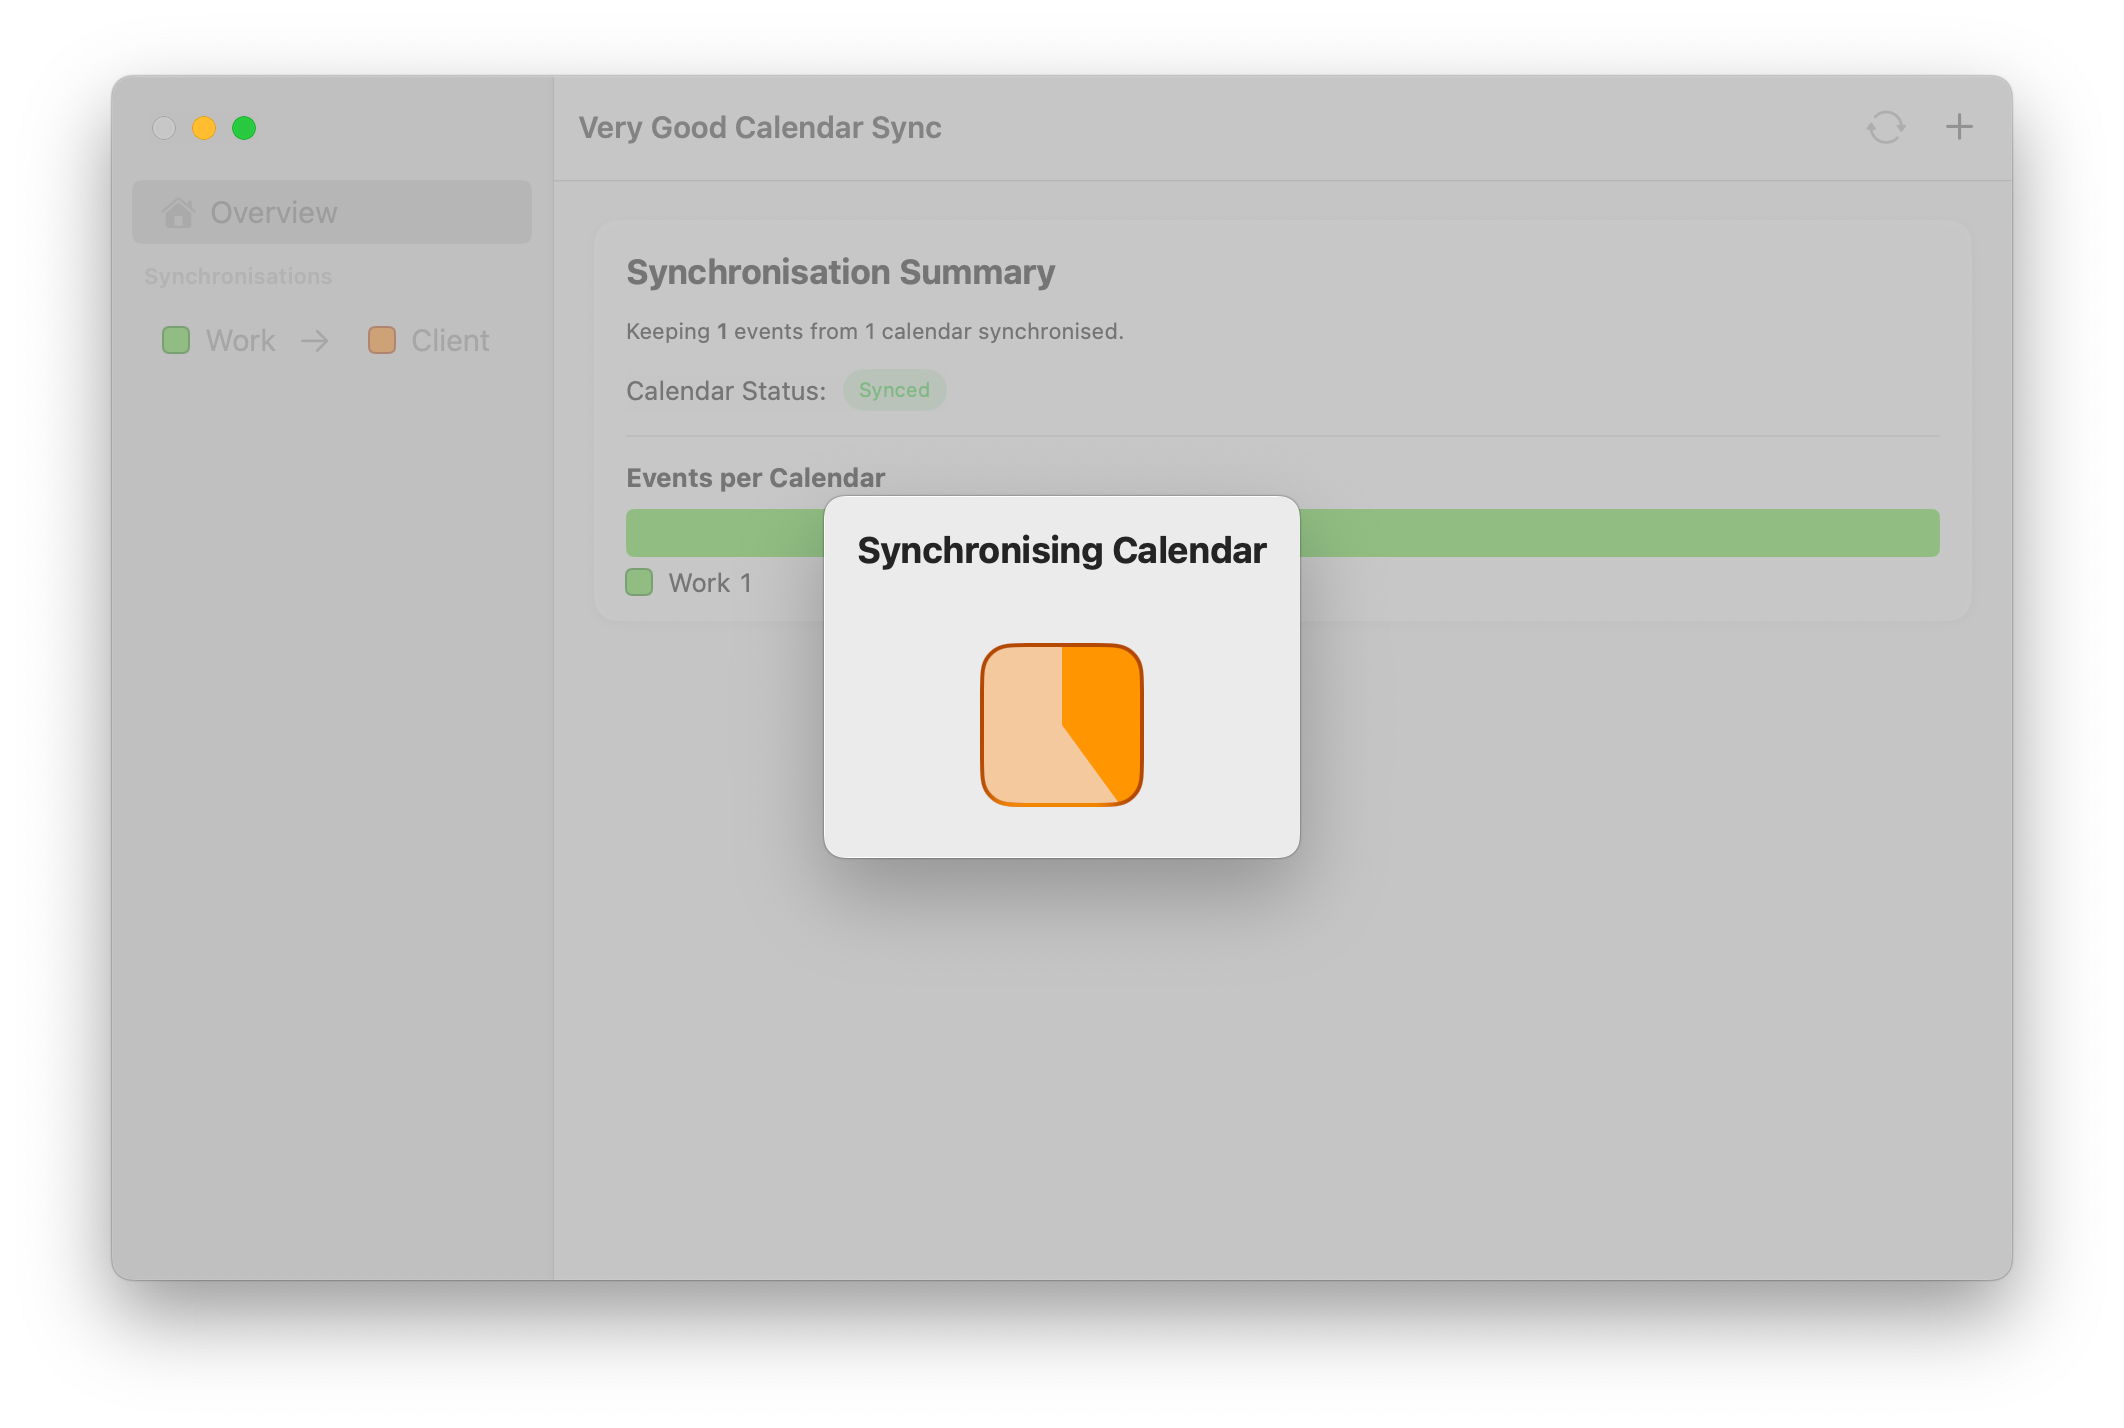
This is for the initial calendar synchronisation that takes all events into account. Depending on the number of events your source calendar has, this might take some time.
The good news is, even if the initial synchronisation takes a while to complete, every consecutive synchronisation will be quicker because not the whole history will be looked at for that.
Eventually the modal will complete: 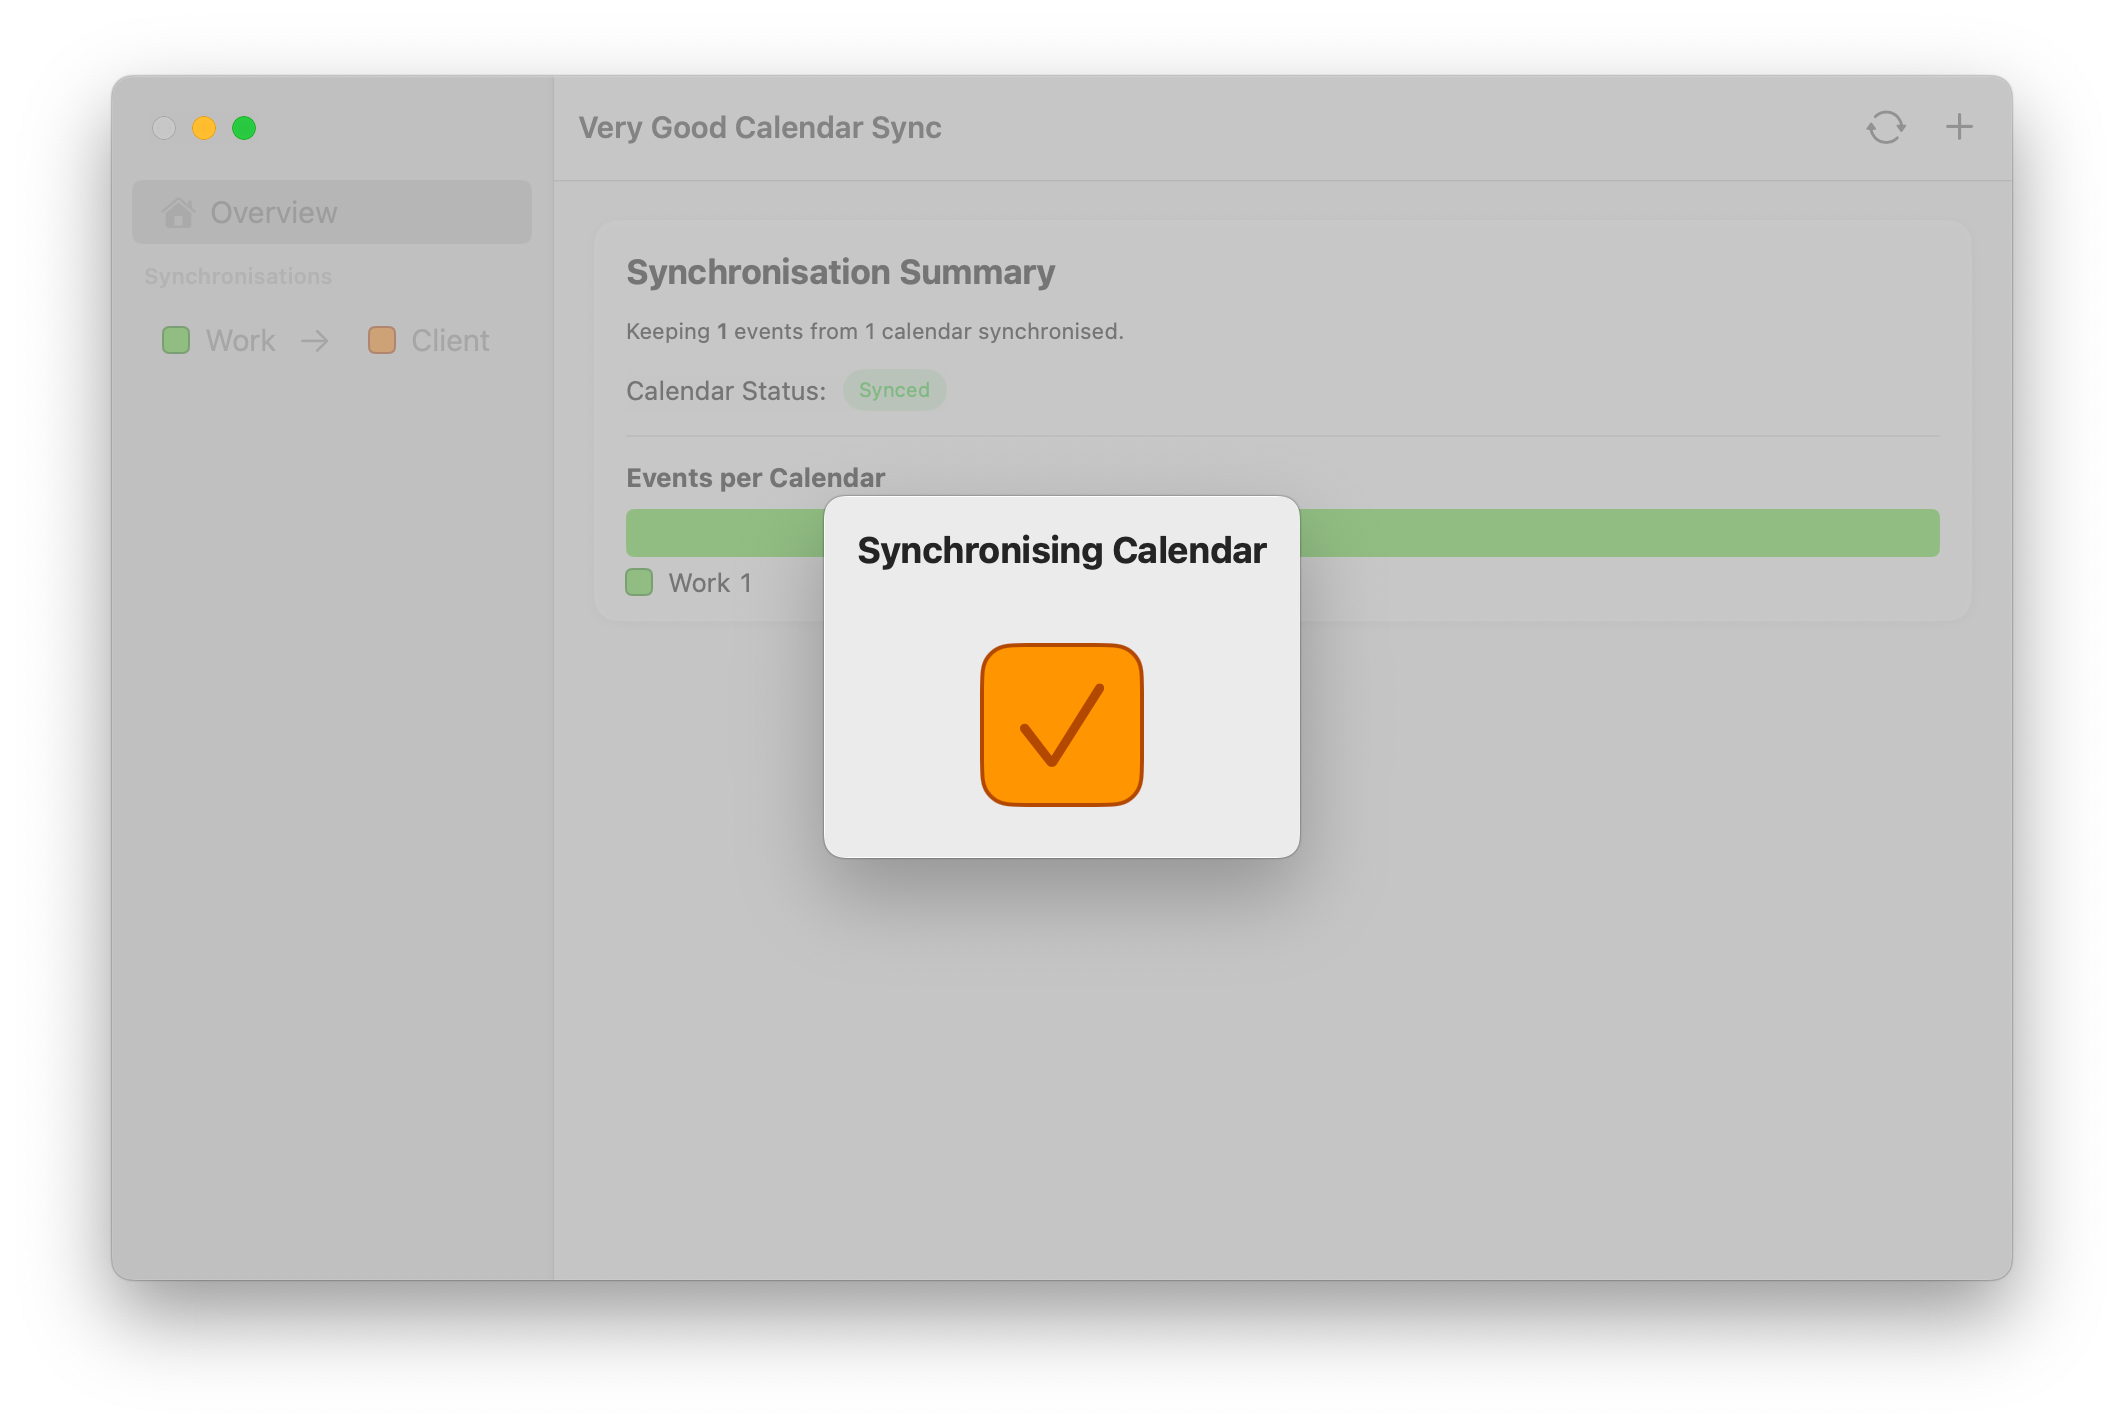
When the synchronisation is finished, and because this is the first synchronisation you added, you will be asked if you want to add Very Good Calendar Sync as a login item:
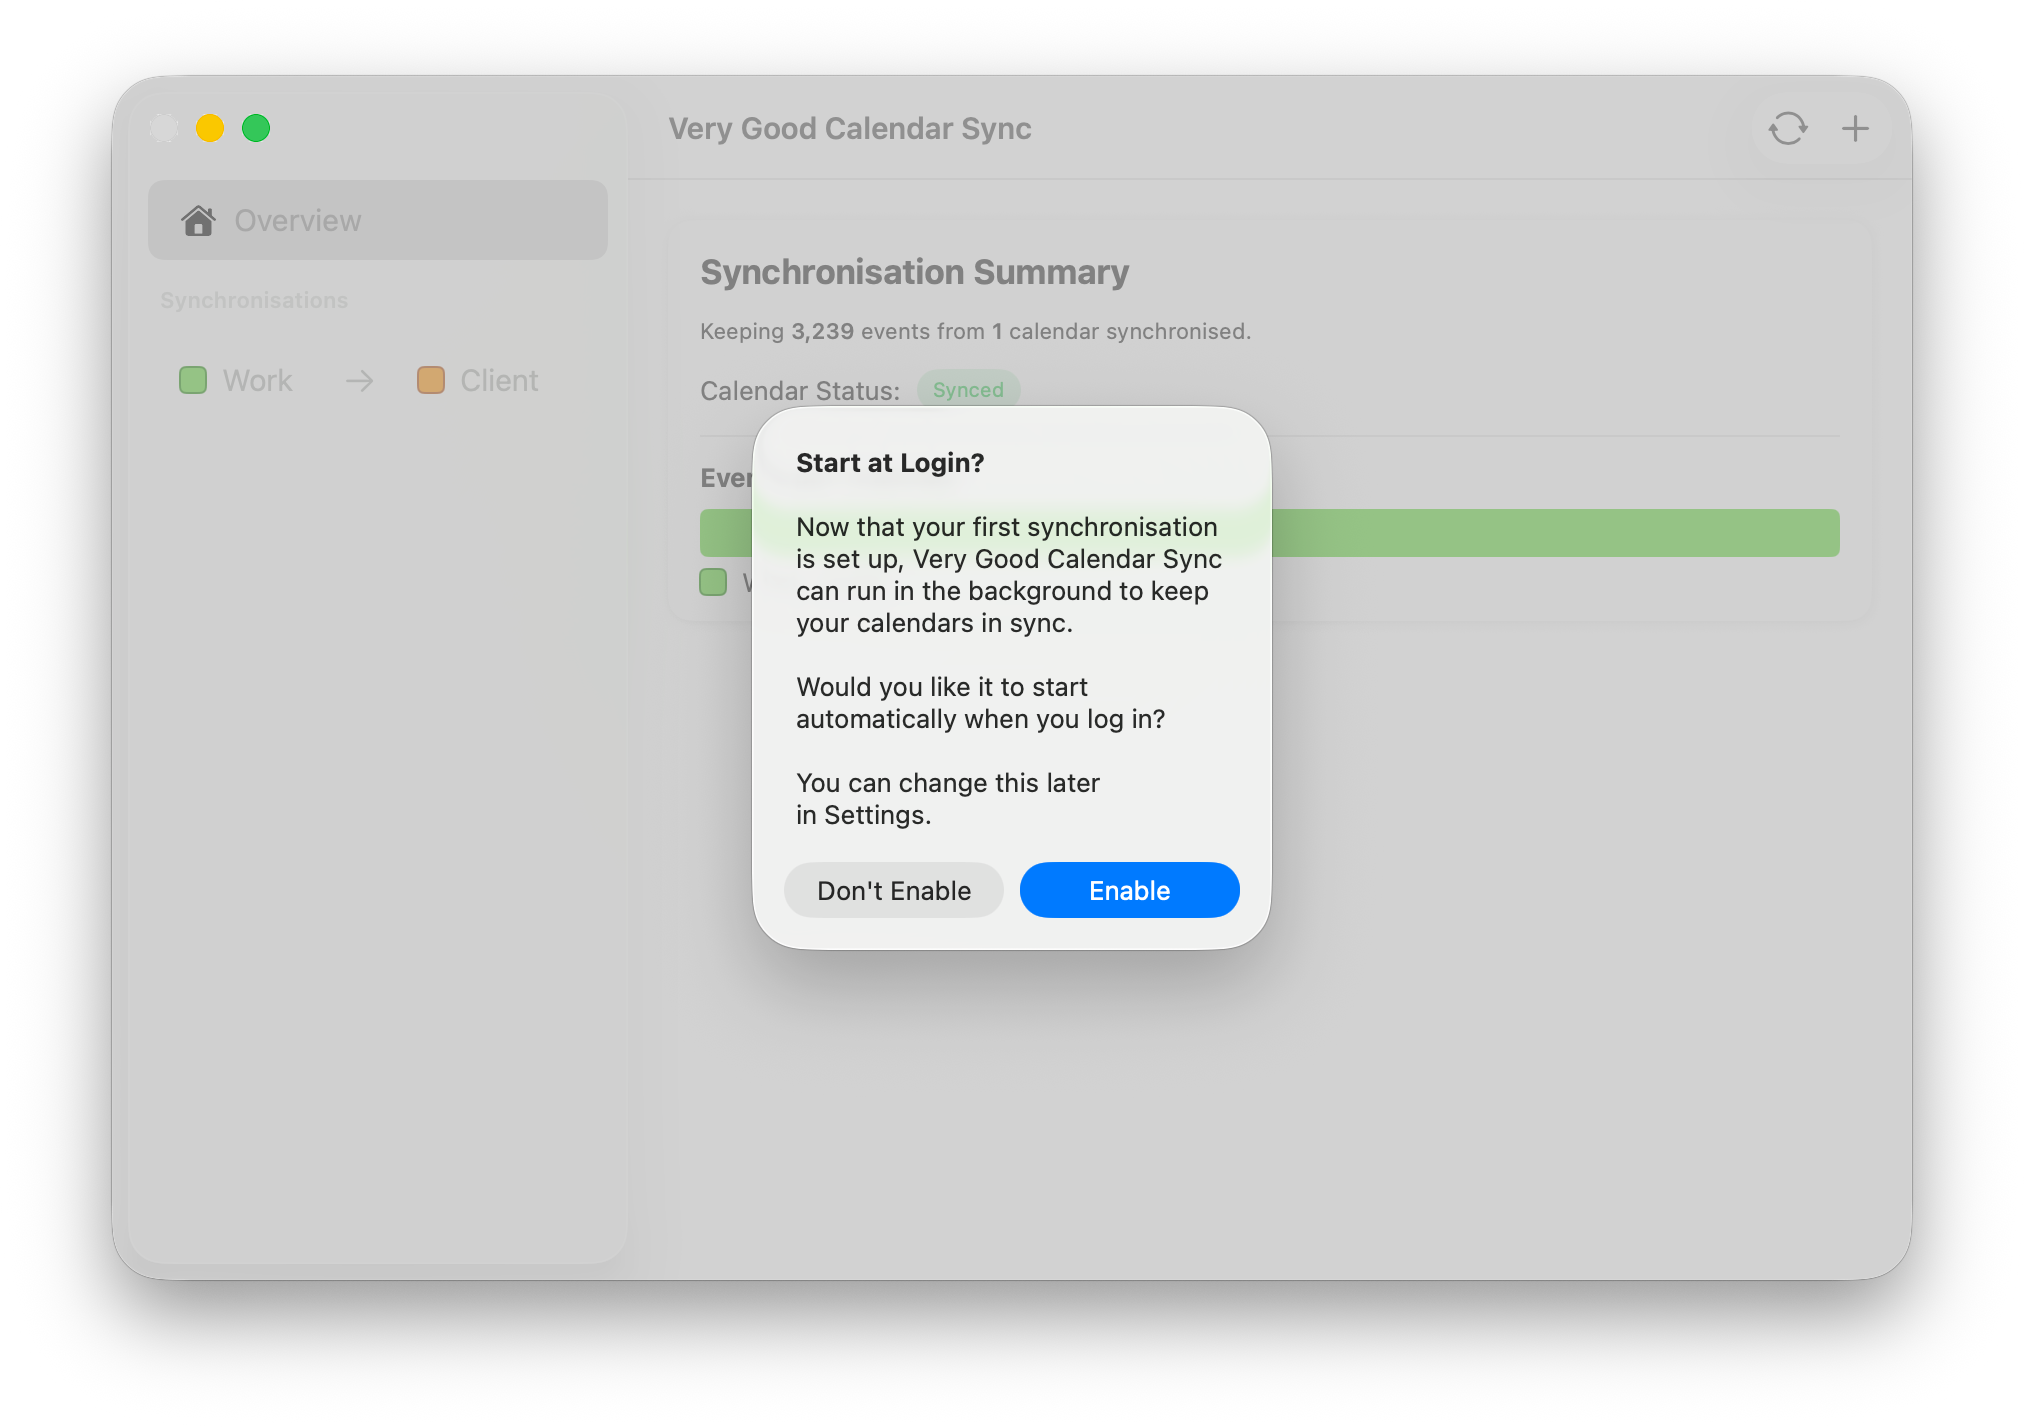
It is practical to set it as a login item as this will help keep your calendars up to date without having to remember to start the application every time you log in into macOS.
Once you confirm the login item prompt, you will see an overview of your configured synchronisation(s).
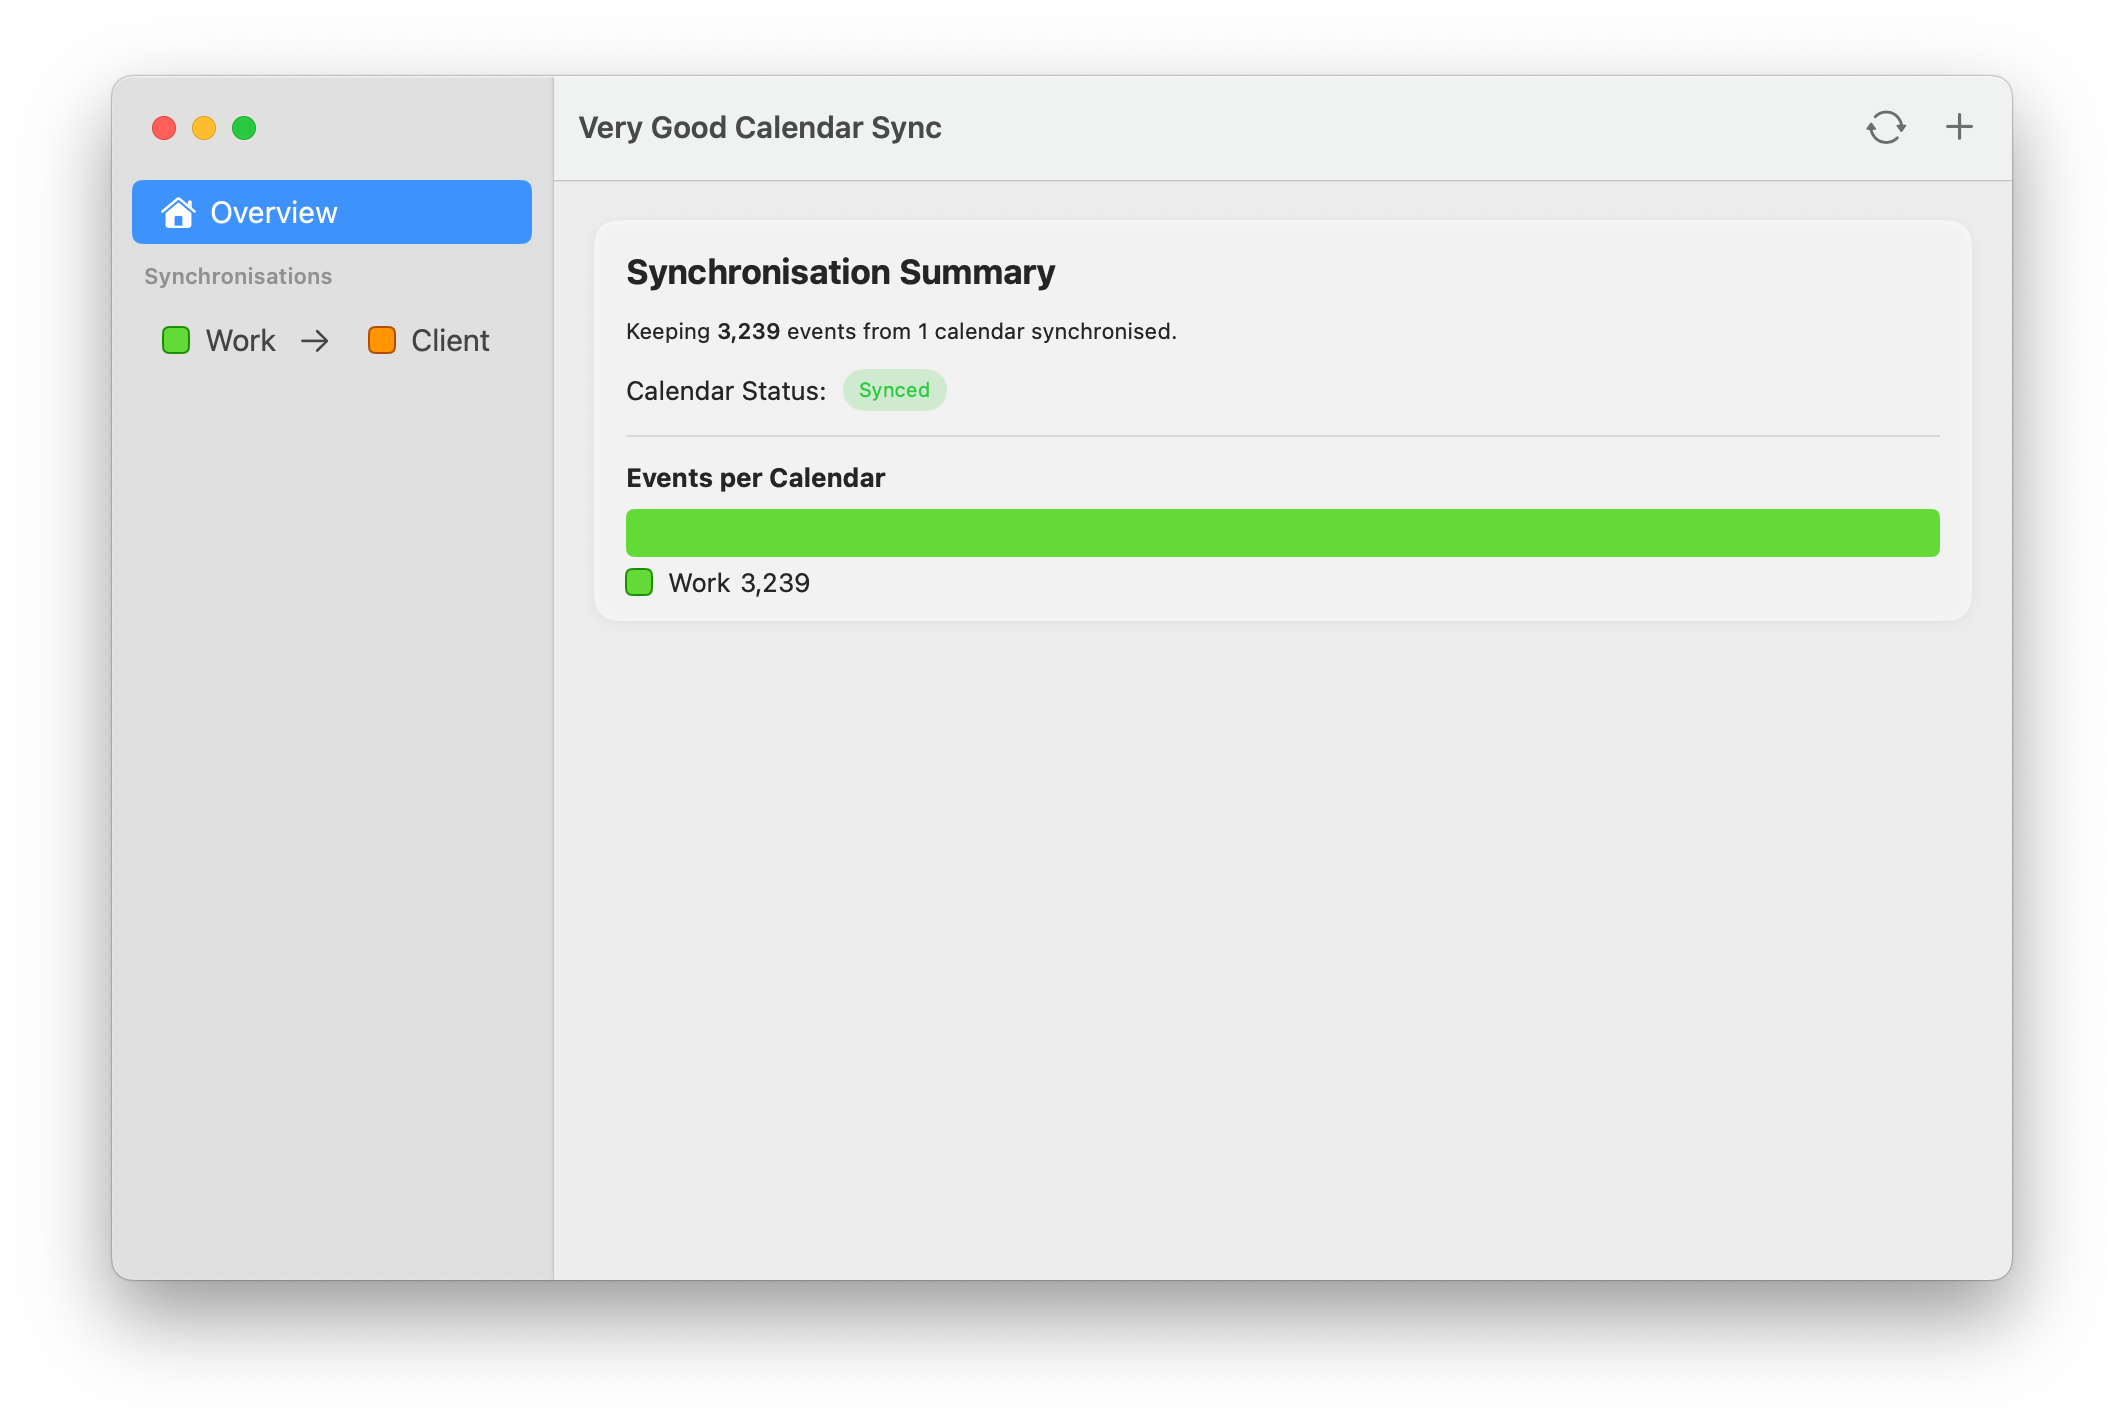
And this is all it takes to create a new synchronisation!
Whenever there's a new or updated event in the calendar, Very Good Calendar Sync will automatically synchronise everything into the target calendar again.
Your first synchronisation is completely free. If you'd like to add more, take a look at the Pricing & Licensing page for details on available plans.